English
 Français
 Español
 Português
 中国人
中国人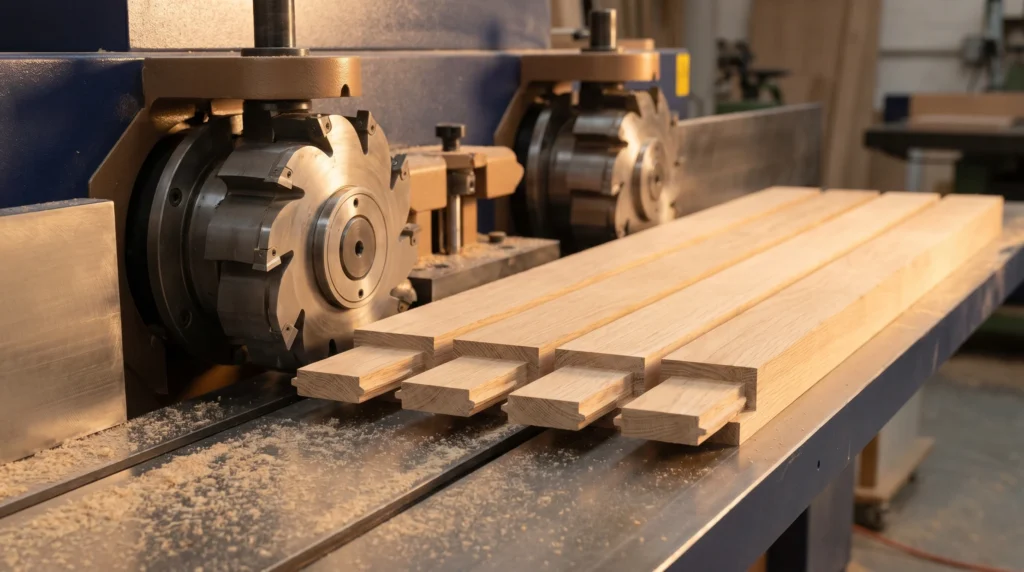
The double end tenoner is one of the great workhorses of production woodworking — when it’s set right, it turns out tenons faster and more consistently than almost any other method. When it’s set wrong, it wastes material, dulls tooling, and produces joints that won’t hold. A solid double end tenoner setup comes down to understanding your tooling, taking the time to align everything carefully, and building in the steps that prevent common problems like tear-out at the shoulder and drift across a long run. This guide walks you through the full process.
Safety Before You Begin
Lock out and tag out the machine before any tooling changes, alignment checks, or fence adjustments. All tenoning heads operate at high spindle speeds — never reach near rotating tooling and never bypass guards. Verify that all clamping and conveyor components are clear of personnel before restoring power. Follow your machine manufacturer’s operating and safety procedures.
Tooling Selection
Tooling choice sets the ceiling on your results. For most production tenoning applications, you’ll be working with a combination of:
- Scoring heads (bottom and/or top): Small-diameter cutters that score the wood fibers at the shoulder line just before the main heads remove material. Scoring prevents tear-out by severing fibers cleanly before the larger tooling pushes through.
- Main tenoning heads: Remove the bulk of the material on the cheek faces.
- Shoulder heads (profile or flat): Clean the shoulder of the tenon; these may be simple flat cuts or shaped to a specific profile for a decorative shoulder.
Match your tooling to the species and production volume. For hardwoods or high-volume runs, carbide-tipped tooling will hold an edge significantly longer than high-speed steel. For custom or specialty tenon profiles — haunched tenons, angled tenons, shaped shoulders — CGG Schmidt can grind tenoner tooling to your specifications from a drawing, sample, or DXF file.
Step-by-Step: Double End Tenoner Setup
- Lock out the machine. Before touching tooling, fences, or conveyor components, verify power is disconnected and locked out.
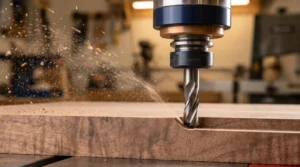
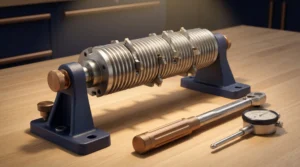
- Install and verify all tooling. Mount scoring heads, main tenoning heads, and shoulder cutters per your machine’s tooling assembly procedure. Torque all fasteners to spec. Spin each head by hand to confirm smooth rotation with no binding, wobble, or runout. If you detect runout, stop and investigate before proceeding — runout in a tenoning head shows up immediately as a wavy, inconsistent cheek surface.
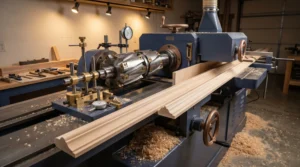
- Set tenon length. Tenon length is controlled by the distance between the two working ends of the machine. Measure carefully using a reliable reference — a calibrated digital readout, a machinist’s scale, or a reference block of the correct length. Set both sides to the same measurement from the reference fence. Run a test piece and verify the tenon length against your target dimension before proceeding.
- Set tenon thickness (cheek cut). Adjust the main tenoning heads so the distance between their cutting circles equals your target tenon thickness. This is typically adjusted by moving the heads vertically. Use a dial indicator to measure from a fixed reference point on the machine to the cutting circle of each head. Confirm that the top and bottom heads are equidistant from the centerline if your tenon is centered, or offset as required for your joint.
- Set the scoring heads. Scoring heads should be positioned to cut just outside the shoulder line — typically just ahead of (before) the main tenoning heads in the cut sequence. Their cutting depth should be shallow, just enough to sever the surface fibers cleanly. The scoring cut creates a small kerf that defines the shoulder line and prevents the main head from blowing out the surface as it exits the cut. Align scoring heads carefully to the shoulder line; a misaligned scorer creates a double mark or leaves unsupported fibers at the shoulder.
- Set shoulder heads and profile cutters. If your tenon requires a profiled or flat shoulder cut, set the shoulder cutters to meet the scored line precisely. The shoulder must be square (or at the specified angle) and clean. Check with a square against a test piece.
- Set fences and hold-downs. The infeed fence controls part width registration. Hold-downs and clamping shoes keep the workpiece flat on the conveyor and against the fence throughout the cut. Loose or under-pressured hold-downs are a primary cause of inconsistent tenon thickness — the workpiece lifts or shifts mid-cut. Set hold-downs to firm, consistent pressure without causing feed hesitation.
- Set conveyor feed speed. As with any moulding or tenoning operation, feed speed affects chip load and surface quality. Too fast creates overload and rough cheeks; too slow can cause burning or excessive rubbing on the tenon cheeks. Start at a moderate speed, run a test piece, and adjust based on surface quality and dimensional results.
- Run test pieces and measure. Run at least two or three test pieces and measure every critical dimension: tenon length, tenon thickness, shoulder squareness, and shoulder cleanliness. Use calipers for thickness measurements — eyeballing is not sufficient for production work. Check that the tenon fits your corresponding mortise or rail with the intended fit (snug but not forced; no slop).
- Lock all adjustments and document the setup. Once you’ve verified a good result, lock all adjustable components and document your setup parameters. For repeat jobs, setup documentation saves significant time and reduces the risk of operator-to-operator variation.
Common Mistakes
Skipping the scoring heads. Scoring is the most frequently skipped step in tenoner setup — and the most frequently missed cause of shoulder tear-out. Even in species that seem forgiving, scoring provides a clean shoulder that sanding cannot fully recover. Don’t skip it.
Not checking for runout. Tenoning heads that have even small amounts of runout produce wavy, inconsistent cheek surfaces. Check by hand before every run and investigate any roughness in spindle rotation.
Setting tenon thickness by eye. Tenon thickness directly determines joint fit. Measure with calipers, not by feel. A tenon that’s 0.010″ too thick will split a rail under assembly pressure; one that’s too thin will produce a weak, sloppy joint.
Under-pressured hold-downs. Workpieces that shift or lift mid-cut produce tenons with inconsistent thickness across their length. This is a particular problem on shorter workpieces. Verify hold-down pressure on the shortest pieces in your production run.
Not re-checking after tooling changes. Any time you swap tooling — even the same nominal part number — re-run your setup checks. Small manufacturing tolerances in tooling add up, and a head that measures “the same” may cut slightly differently.
Running dull tooling. Dull tenoning cutters don’t just produce rough surfaces — they push and compress wood fibers at the shoulder rather than cutting them, leading to splintering and a shoulder that’s difficult to fit cleanly. Sharp tooling is a production investment, not a luxury.
CGG Schmidt manufactures and re-grinds tenoner tooling for a wide range of machines and applications, including custom profiles and matched sets for consistent production results. If you’re setting up a new tenoning operation or experiencing quality issues with your current tooling, we’d be glad to help.
Call us at 1-800-SCHMIDT or reach out at info@cggschmidt.com — Charles G.G. Schmidt & Co. has been grinding precision cutting tools for woodworking shops since 1926, and we’re here to help you get the most out of your machine.